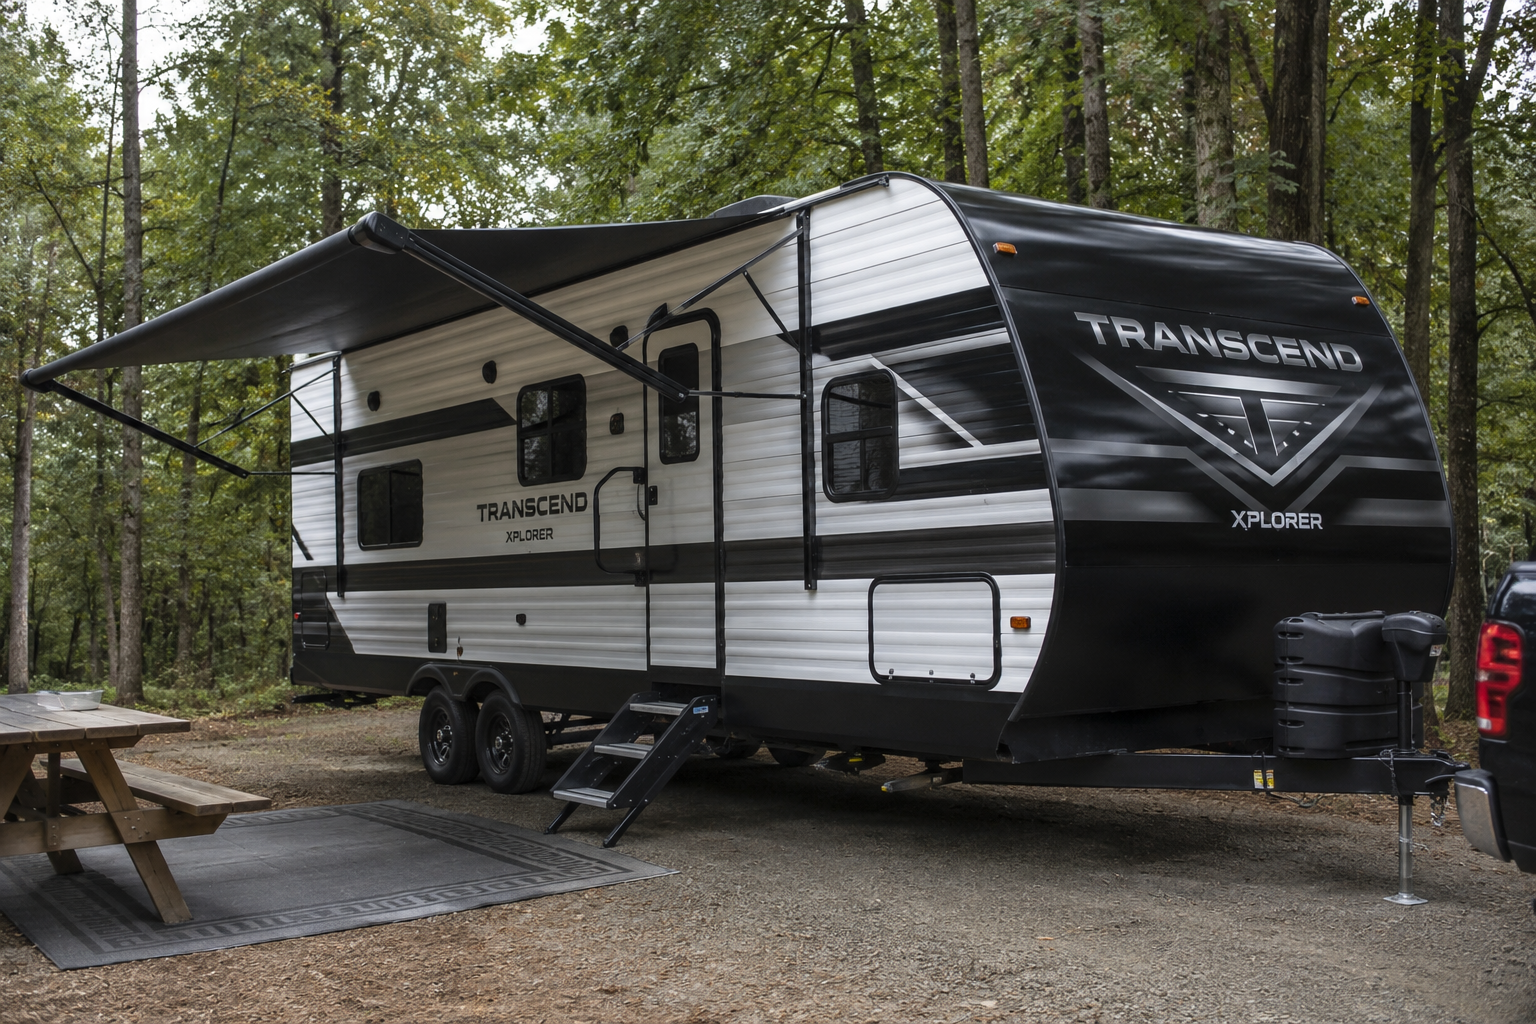
On one of our favorite parts of travel trailer camping is finally arriving at the campground.
Whether we’re spending a weekend in the North Carolina mountains, camping near a lake, or enjoying a quick getaway close to home, there’s always a sense of excitement when we pull into our campsite.
At the same time, arriving after a long drive can be a little hectic.
It’s easy to get distracted, rush through the process, or forget an important step.
Over the years, we’ve learned that having a consistent travel trailer setup routine makes every camping trip more enjoyable.
Instead of wondering if we remembered something important, we can focus on settling in, taking our Miniature Schnauzer for a walk, and enjoying the adventure ahead.
This is the travel trailer setup checklist we follow on every camping trip.
Why We Always Use a Travel Trailer Setup Checklist
When we first started camping with our travel trailer, our arrival routine wasn’t always as organized as it is today.
Nothing major ever went wrong, but we occasionally found ourselves double-checking connections, repeating steps, or realizing we had overlooked something simple.
Creating a repeatable setup process helped eliminate that stress.
Benefits of a Consistent Setup Routine
A setup checklist helps us:
- Improve campsite safety
- Avoid forgotten steps
- Protect RV systems
- Speed up campsite setup
- Reduce stress
- Create a smoother camping experience
The best part is that after a few trips, the process becomes second nature.
Before You Pull Into the Campsite
Before backing into any campsite, we always take a few minutes to inspect the area.
Those few minutes can prevent a lot of frustration later.
Check the Campsite Layout
We look for:
- Low-hanging branches
- Large rocks
- Utility pedestal locations
- Fire pit placement
- Picnic table location
- Space for slide-outs
- Potential obstacles
This quick walkaround helps us visualize exactly where we want the trailer positioned.
Use a Spotter
Whenever possible, one family member guides the driver into the site.
Clear hand signals and communication make backing into campsites much easier, especially in tighter campground loops.
This is one step we never skip. This also allows us to align all of our connections up before we disconnect from the truck.
Positioning and Leveling the Trailer
Once we’re in position, we begin our leveling process.
Position the Trailer Carefully
Before doing anything else, we verify:
- The trailer is centered
- The entry door opens fully
- Slide-outs have enough clearance
- The awning area is usable
- Outdoor seating space is comfortable
Spending an extra minute here often saves time later.
Level Side-to-Side
Before unhitching, we always level side-to-side first.
We use RV leveling blocks beneath the low-side tires when necessary.
To confirm we’re level, we use either:
- A bubble level
- A leveling app
- A built-in leveling system
Getting this step right makes everything else easier.
Chock the Wheels
This is one of the most important safety steps in our setup process.
We place wheel chocks securely against the tires before unhitching. We have tried many wheel chocks and many of them seem to break overtime. We have had these for over six years and they are still amazing.
Wheel chocks help prevent unwanted trailer movement and give us peace of mind while setting up.
If you have a dual axel, I also highly recommend a dual axel stabilizer wheel chock. We use both of these on our travel trailer and it cuts down on movement when walking in the travel trailer.
Unhitching and Stabilizing the Trailer
With the trailer level and secured, we can disconnect from the tow vehicle.
Disconnect From the Tow Vehicle
Our typical process includes:
- Lowering the tongue jack
- Raising the coupler off the hitch ball
- Disconnecting safety chains
- Unplugging the trailer wiring harness
- Removing weight distribution bars if equipped
Taking your time during this step helps prevent accidental damage.
Level Front-to-Back
Once disconnected, we use the tongue jack to level the trailer front-to-back.
Many newer RVs include leveling systems, but a simple level works perfectly well too.
Lower Stabilizer Jacks
After leveling, we lower the stabilizer jacks.
It’s important to remember that stabilizers are designed to reduce movement, not level the trailer.
We lower them until they are snug and secure without lifting the RV.
Connecting Utilities
Once the trailer is stable, we move on to hookups.
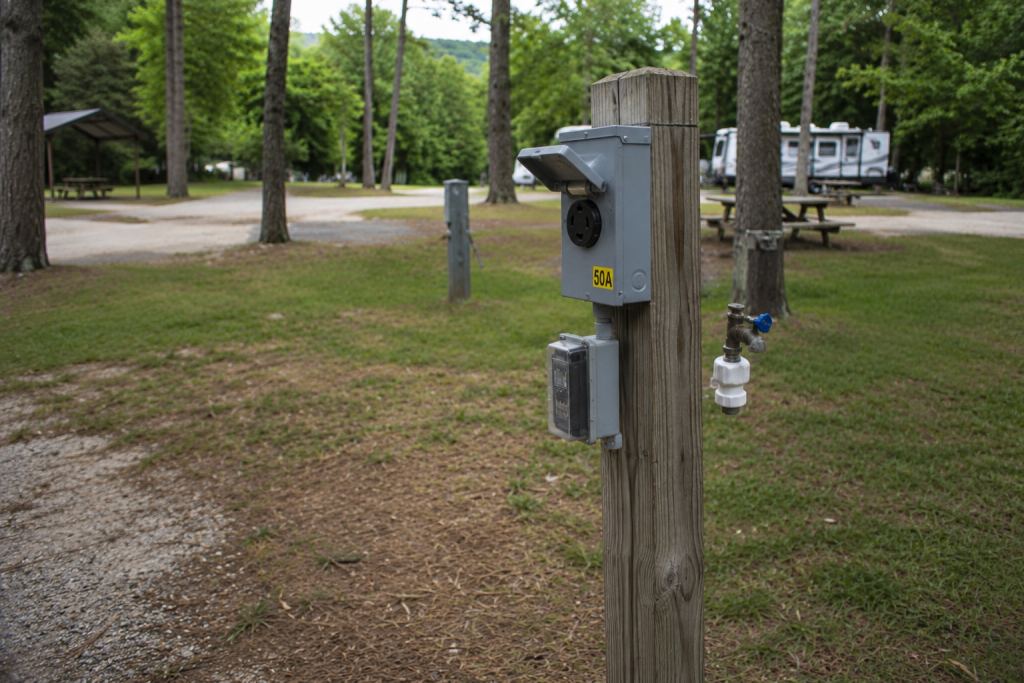
Electrical Hookup
Before connecting power, we inspect the campground pedestal for any obvious signs of damage.
Our electrical hookup routine includes:
- Turn the breaker off
- Connect surge protector
- Plug in the power cord
- Turn the breaker back on
A quality surge protector is one of the most important pieces of RV equipment we own. In the course of owning two travel trailers we have tried many different surge protectors and EMS systems over the years. This one has performed far better than any of the others we have purchased. Not only is it a surge protector, it also allows you to run one AC from a 110 plug. This is amazing even for loading and unloading the travel trailer at home in the summertime when a higher voltage plug is not available. This is the 50 Amp version. They also have a 30 Amp version.
Water Hookup
We never connect directly to campground water without using a few accessories.
Our setup includes:
- Water pressure regulator
- Drinking water hose
- Inline water filter
- Hose Quick Connections
- 90-Degrees Hose Elbow
After connecting, we slowly turn on the water and inspect for leaks.
Sewer Hookup
At full-hookup sites, we connect the sewer hose after completing power and water hookups.
Our sewer setup includes:
- Secure hose connections
- Sewer hose support when needed
- Keeping tank valves closed until dumping
Keeping the valves closed helps maintain proper tank function and reduces odors.
Expanding Our Living Space
One of the things we love about travel trailer camping is creating a comfortable campsite.
Extend the Slide-Outs
Before extending slides, we check for:
- Trees
- Utility posts
- Picnic tables
- Other obstructions
Once everything is clear, we extend the slides according to the manufacturer’s recommendations.
Deploy the Awning
The awning quickly transforms a campsite into an outdoor living area.
We enjoy sitting outside beneath it while our schnauzer relaxes nearby.
However, we only deploy it when weather conditions are favorable.
If strong winds or storms are expected, we keep it retracted.
Interior Trailer Setup
With the outside complete, we move indoors.
Turn On Essential Systems
We typically:
- Verify refrigerator operation
- Turn on the water heater
- Set the thermostat
- Check battery status
- Confirm appliances are working
Organize the Living Space
A few minutes of organization goes a long way.
We put away travel items, organize the kitchen, plug in chargers, and get everything ready for the trip.
Once complete, the trailer feels much more like home.
Setting Up Camp for Our Schnauzer
Our Miniature Schnauzer knows exactly what campground arrival means.
As soon as we stop, she’s ready to start exploring.
Create a Familiar Space
One thing we’ve learned is that dogs settle into a new environment faster when familiar items are available.
We immediately set out:
- Food bowl
- Water bowl
- Dog bed
- Favorite blanket
- Treat container
- Toys
- Leash and harness
Maintaining her normal routine helps her feel comfortable.
Check the Campsite for Hazards
Before allowing her to explore, we inspect the campsite for:
- Sharp sticks
- Fire pit debris
- Broken glass
- Ant mounds
- Wildlife concerns
This quick inspection helps keep everyone safe.
Take an Arrival Walk
One of our favorite camping traditions is taking a short walk immediately after setup.
This gives our schnauzer an opportunity to:
- Burn off energy
- Explore new smells
- Learn the campground layout
- Become comfortable with her surroundings
It also gives us a chance to start relaxing after the drive.
Final Campsite Walkaround
Before declaring setup complete, we always perform one final inspection.
Our Final Walkaround Checklist
✓ Wheel chocks secure
✓ Stabilizer jacks lowered
✓ Utilities connected properly
✓ Slides fully extended
✓ Awning secure
✓ Water heater operating
✓ No visible leaks
✓ Campsite clear of hazards
✓ Dog setup complete
The entire walkaround takes only a few minutes but helps us feel confident everything is ready.
Family Camping Tips
Stay Consistent
Using the same setup routine every trip helps prevent mistakes.
Don’t Rush
A few extra minutes spent checking connections is always worthwhile.
Assign Tasks
Each family member can handle specific responsibilities to make setup faster.
Keep a Printed Checklist
Even experienced campers occasionally forget something.
Having a checklist available can be helpful.
Dog-Friendly Camping Tips
Always Bring Extra Water
Campgrounds don’t always have water nearby when you’re outside.
Use a Long Lead Carefully
Only where campground rules allow and never leave dogs unattended.
Watch Wildlife
Mountain campgrounds often have squirrels, deer, birds, and other wildlife that may excite curious dogs.
Maintain a Routine
Keeping feeding and walking schedules consistent helps dogs settle into camping life more easily.
Why We Never Skip Our Setup Routine
Camping should be relaxing.
Following the same setup process every time helps us avoid unnecessary stress and start enjoying our trip sooner.
Whether we’re camping in the Blue Ridge Mountains, exploring a new campground, or returning to a favorite destination, our setup routine keeps everything organized and safe.
Final Thoughts
Setting up a travel trailer doesn’t have to be complicated.
A simple checklist and a consistent routine can help make campground arrivals smoother, safer, and more enjoyable.
For our family, that means spending less time worrying about setup and more time sitting outside, enjoying the scenery, and watching our Miniature Schnauzer happily explore her temporary backyard.
Those quiet moments are what camping is all about.
You May also Like
First-Time RV Camping Checklist: Everything You Need for a Stress-Free First Trip
Rainy Day Activities While Camping With a Dog
Traveling With a Schnauzer: Why They’re Great Adventure Dogs
Frequently Asked Questions
How long does it take to set up a travel trailer?
Most setups take between 20 and 45 minutes depending on campsite conditions and hookups.
Should you level a travel trailer before unhitching?
Yes. Side-to-side leveling should be completed before unhitching from the tow vehicle.
Do stabilizer jacks level a travel trailer?
No. Stabilizer jacks reduce movement but should not be used for leveling.
What RV accessories are essential for campsite setup?
Leveling blocks, wheel chocks, a surge protector, water pressure regulator, drinking water hose, and sewer hose support are all helpful.
When should sewer valves remain closed?
For most campers, keeping tank valves closed until dumping helps maintain proper tank function.
What should I do immediately after setting up camp?
We recommend taking a short campground walk, checking the campsite, and helping pets settle into their new surroundings.
Affiliate Disclosure
This post may contain affiliate links. If you make a purchase through these links, we may earn a small commission at no additional cost to you. We only recommend products, services, and destinations that we genuinely believe may be helpful to our readers.
Advertising Disclosure
Travelers and a Schnauzer participates in advertising programs, including Google AdSense. Advertisements displayed on this site help support our content and allow us to continue sharing travel tips, destination guides, camping adventures, vacation rental experiences, and travels with our miniature schnauzer.
Leave a Reply